
Mixing Media and Pouring Plates
Liquid or Agar Media?
If you’re wondering whether you’re meant to use liquid or agar (solid) media for your experiments, excellent! You’re already asking the right questions. In short, the answer is both! You’re going to need to learn how to produce both liquid and agar media. Agar media is also a bit trickier since it requires you to pour your plates while the media cools from the autoclave, or after a few zaps in the microwave. Check out our plate pouring protocol below for more info on how to pour plates so beautiful you’d think you paid top dollar for a company to do it for you.
Solid media is useful because it allows us to observe and isolate distinct colonies of our microorganisms. Well isolated colonies of E. coli and other bacteria should be genetically identical, since they will have arisen from a single cell. You’ll learn more about the tips and tricks for obtaining isolated colonies on the Sterile Technique page.
Liquid media is useful for growing lots of cells within a much larger three dimensional space. We will generally be attempting to inoculate liquid media from isolated colonies on a solid medium - ensuring all the cells in the liquid culture share a specific genotype.
Protocol: LB Agar Media
Protocol: LB Liquid Media
While these recipes are for our classic LB media, there are of course a vast array of media recipes out there. Keep in mind that all these recipes combined can only grow at most 1% of the microorganisms on this planet, the “culturable microorganisms”. The realm of the undiscovered is out there, waiting for you!
A lot of the time when working with plasmids and bacteria, you will also need to add antibiotics as a selective agent. It is very important to do this after the medium has cooled down from autoclaving. Other experiments may require the addition of trace elements or other heat-sensitive reagents that wouldn’t survive in the autoclave. As such, it is really valuable to have these heat sensitive reagents pre-prepared as stock solutions, ready to add in easy to calculate volumes.
We biologists hate math. Use the following protocol to aid your goal of producing Stock Solutions that don’t require any active thinking when calculating how much to add to your media.
Protocol: Antibiotic Stock Solution Mixing
Plate Pouring
Equipment & Consumables:
Laminar Flow Hood (or) Biosafety Cabinet (or) Sterile Workspace with lit Bunsen Burner on hot flame
Paper Towels
PPE: Lab Coat and Gloves are optional
If you’re using gloves near the lit bunsen flame, be very careful, especially if you sprayed them down with ethanol.
Lab Coat sleeves can drag around in the laminar flow hood or sterile workspace, potentially contaminating plates. Only use a Lab Coat if you have sleeves that tighten.
Petri Dishes (Plastic or Glass)
Molten LB-Agar media, autoclaved and with lid slightly loose to allow for air exchange (or) solidified LB-Agar.
If your Agar media has hardened, you can remelt it in the microwave with no loss in capacity. Don’t do this after antibiotic addition!
Optional: Antibiotic (or alternative selective ingredient) stock solution for the plates you want to make
Protocol:
When the agar comes out of the autoclave, if it’s still molten and very hot, put it in the hot water bath (~60°C) until it cools down to pouring temperature (~15 min).
If you don’t want to use it immediately, leave on the bench until it solidifies (if it hasn’t already), then tighten the cap and it can be stored indefinitely at room temp.
If the agar has solidified and you want to use it straight away, microwave it (lid loose!) for approx 10 min on 50% power (these settings are for 400 ml of agar at room temp, adjust accordingly!), then put it in the hot water bath for ~15 min or leave it on the bench if you don’t have a bath.
Collect one bottle of molten agar from the waterbath, wipe down the outside with paper towel, and take to your bench or laminar flow hood (read instructions on preparing the hood). It should be cool enough to touch with your bare hands, which means you probably won’t denature your antibiotics by adding them.
Add any “after-autoclaving” additions at this stage, from filter-sterilised stock solutions (this may be antibiotics, or trace metals solution, or Tween etc). Mix by swirling for 10-20 seconds, don’t shake the bottle as this will cause persistent bubbles. It’s good practice to write all the additions on the bottle, then tick them off after each addition. Forgetting these is bad!
If you followed our Guide For Producing Antibiotic Stock Solutions, the quantity to add is (Your volume of media in ml, but now it’s in µl). So if you have 1000 ml of media, add 1000 µl of antibiotic stock. If you have 400 ml, add 400 µl of antibiotic stock. Simples!
If you didn’t, good luck with the maths!
IF YOU HAVE A LAMINAR FLOW HOOD
Prepare laminar flow hood for plate pouring as follows:
Give it a blast of UV for ~15 min with the doors closed.
Turn off UV light
Turn on the light and fan and open the doors.
Swab down the inside with 70% ethanol.
If you are working with very slow-growing microbes and/or you are making rich medium non-selective plates, you can add an extra layer of sterility to the proceedings by wearing gloves, and rinsing the gloves thoroughly in 70% ethanol before you start pouring the plates.
If you do this, don’t work near a bunsen. It’s not worth scarring those lovely hands of yours.
Open up one sleeve of plates (at the ‘base’ end), and slide them out 2-3 at a time into the laminar flow hood, near the front. Keep the sleeve in the hood as well!
Lift off the lid of the first plate and pour in liquified agar media in one smooth motion, enough to cover about 70% of the bottom of the plate
Replace the lid, then gently use the lid to move the entire petri dish in a circular motion to ‘swirl’ the agar out to the edge.
Place the lid in the back left corner of the hood and then slide the poured plate over to sit in front of it.
Repeat, pouring each plate and then leaving them open to cool at the back of the laminar flow hood.
Don’t reach over the plates or lids as this might result in contamination.
Once you run out of space, leave the plates for about 10 minutes or until the most recently poured plate is solid. Give it a wobble test if you’re unsure.
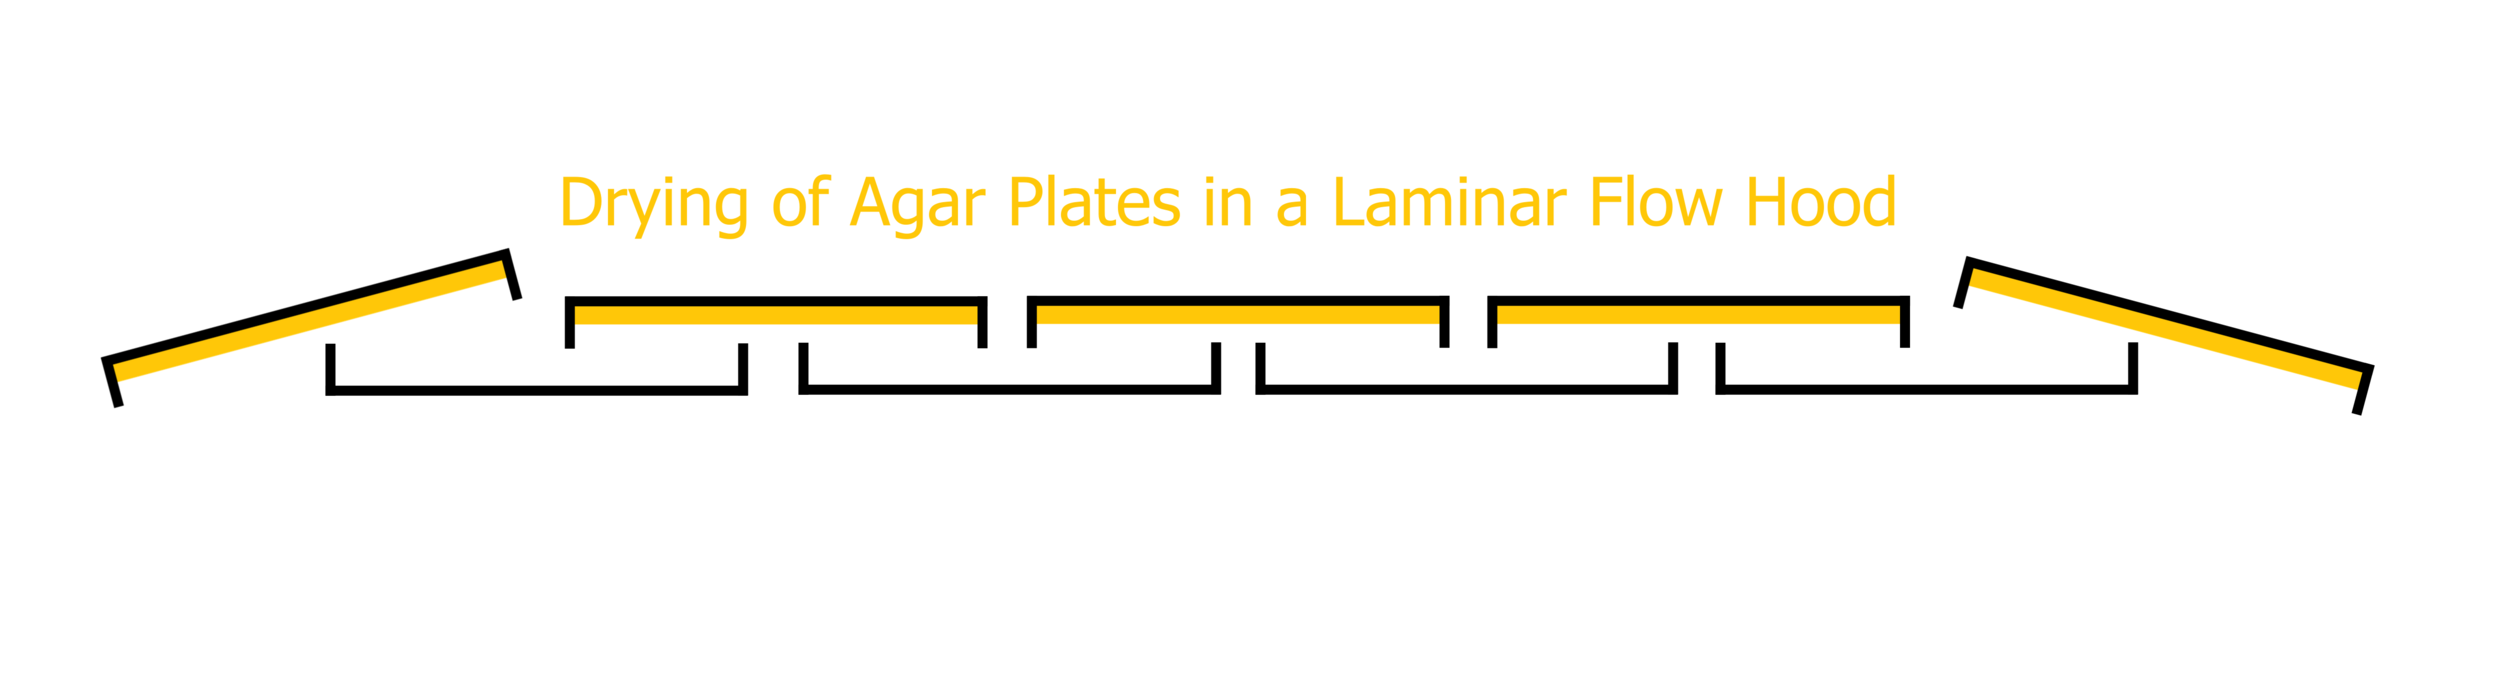
Start by flipping the plates closest to you onto their adjacent lids so that they’re upside-down. This will make a mess if you didn’t wait long enough for them to harden. Allow them to dry for 20-30 minutes. The setup should look something like this:
10. Once the plates are sufficiently dry, slide them back onto their lids and then write in small letters (Type of Media-Antibiotic) on the base of the plate (not the lid!).
e.g. LB with Ampicillin is (LB-Amp), LB with Chloramphenicol is (LB-Cm)
Be sure to label each plate this way, but don’t label the date. The date on a plate should be the date it is inoculated with a sample, not the day it is poured.
11. Slide the plates back into the bag 2-3 at a time, with the lid on the bottom and the agar at the top. Tape the bag closed with masking tape and then write (Media-Antibiotic-Date-Name) on the masking tape. Place the plates into the fridge at 4°C.
Some plates (such as Ampicillin) will last less than 2 months before contamination in the bag becomes an issue.
Other plates (such as Kanamycin) can last well over a year without any noticeable growth.
Non-antibiotic plates should last at least two weeks before becoming contaminated. If you notice contamination within the first two weeks, consider refining your technique or sterilisation protocol.
if you don’t have a laminar flow hood
If you don’t have access to the laminar flow hood, you can make plates on your regular lab bench. This is usually fine, but wipe down the bench with 70% ethanol first, and work close to the Bunsen flame.
Follow the techniques described on The Sterile Workspace and Sterile Technique pages!
This protocol will produce plates as sterile as the ones made in the laminar flow hood, but the lack of a drying step means that there will be more condensation within the plates. This isn’t necessarily a bad thing, as it will still be sterile within the plate… just a bit soggy.
Open up one sleeve of plates (at the ‘base’ end), and slide them out 2-3 at a time, ensuring they stay closed. Keep the sleeve!
Working under the flame, lift the lid of an agar plate to a 45˚ angle and then pour in enough liquified agar media to cover about 70% of the bottom of the plate in one smooth motion.
Replace the lid of the plate, then gently use the lid to move the entire petri dish in a circular motion to ‘swirl’ the agar out to the edge. The agar should spread out to cover the entire bottom of the plate, with ~1-3mm of depth.
Pouring too much (4+ mm) will still produce a useful plate, it’s just a waste of resources.
Try to minimise or pop any bubbles while pouring and swirling. Bubbles won’t ruin the plate, but can sometimes be mistaken for colonies, falsely getting your hopes up when you actually failed twice.
Leave the plate on the bench with the lid on until the agar media is completely solid (10-15 minutes if you didn’t pour too much media into each plate).
Repeat until you run out of plates or media to pour. Wait until the final plates are completely dry.
You can ‘wobble’ the last plate you poured to see if it’s got any wobble. If it’s firm, you’re ready to proceed.
Flip each plate upside-down (so the media is on the top and hanging) and then write in small letters (Type of Media-Antibiotic) on the base of the plate (not the lid!).
e.g. LB with Ampicillin is (LB-Amp), LB with Chloramphenicol is (LB-Cm)
Be sure to label each plate this way, but don’t label the date. The date on a plate should be the date is is inoculated with a sample, not the day it is poured.
Slide the plates back into the bag 2-3 at a time, with the lid on the bottom and the agar at the top. Tape the bag closed with masking tape and then write (Media-Antibiotic-Date-Name) on the masking tape. Place the plates into the fridge at 4°C.
Some plates (such as Ampicillin) will last less than 2 months before contamination in the bag becomes an issue.
Other plates (such as Kanamycin) can last well over a year without any noticeable growth.
Non-antibiotic plates should last at least two weeks before becoming contaminated. If you notice contamination within the first two weeks, consider refining your technique or sterilisation protocol.
Acknowledgements:
Coleman Protocols 2017 + 2019 http://coleman-lab.org/